
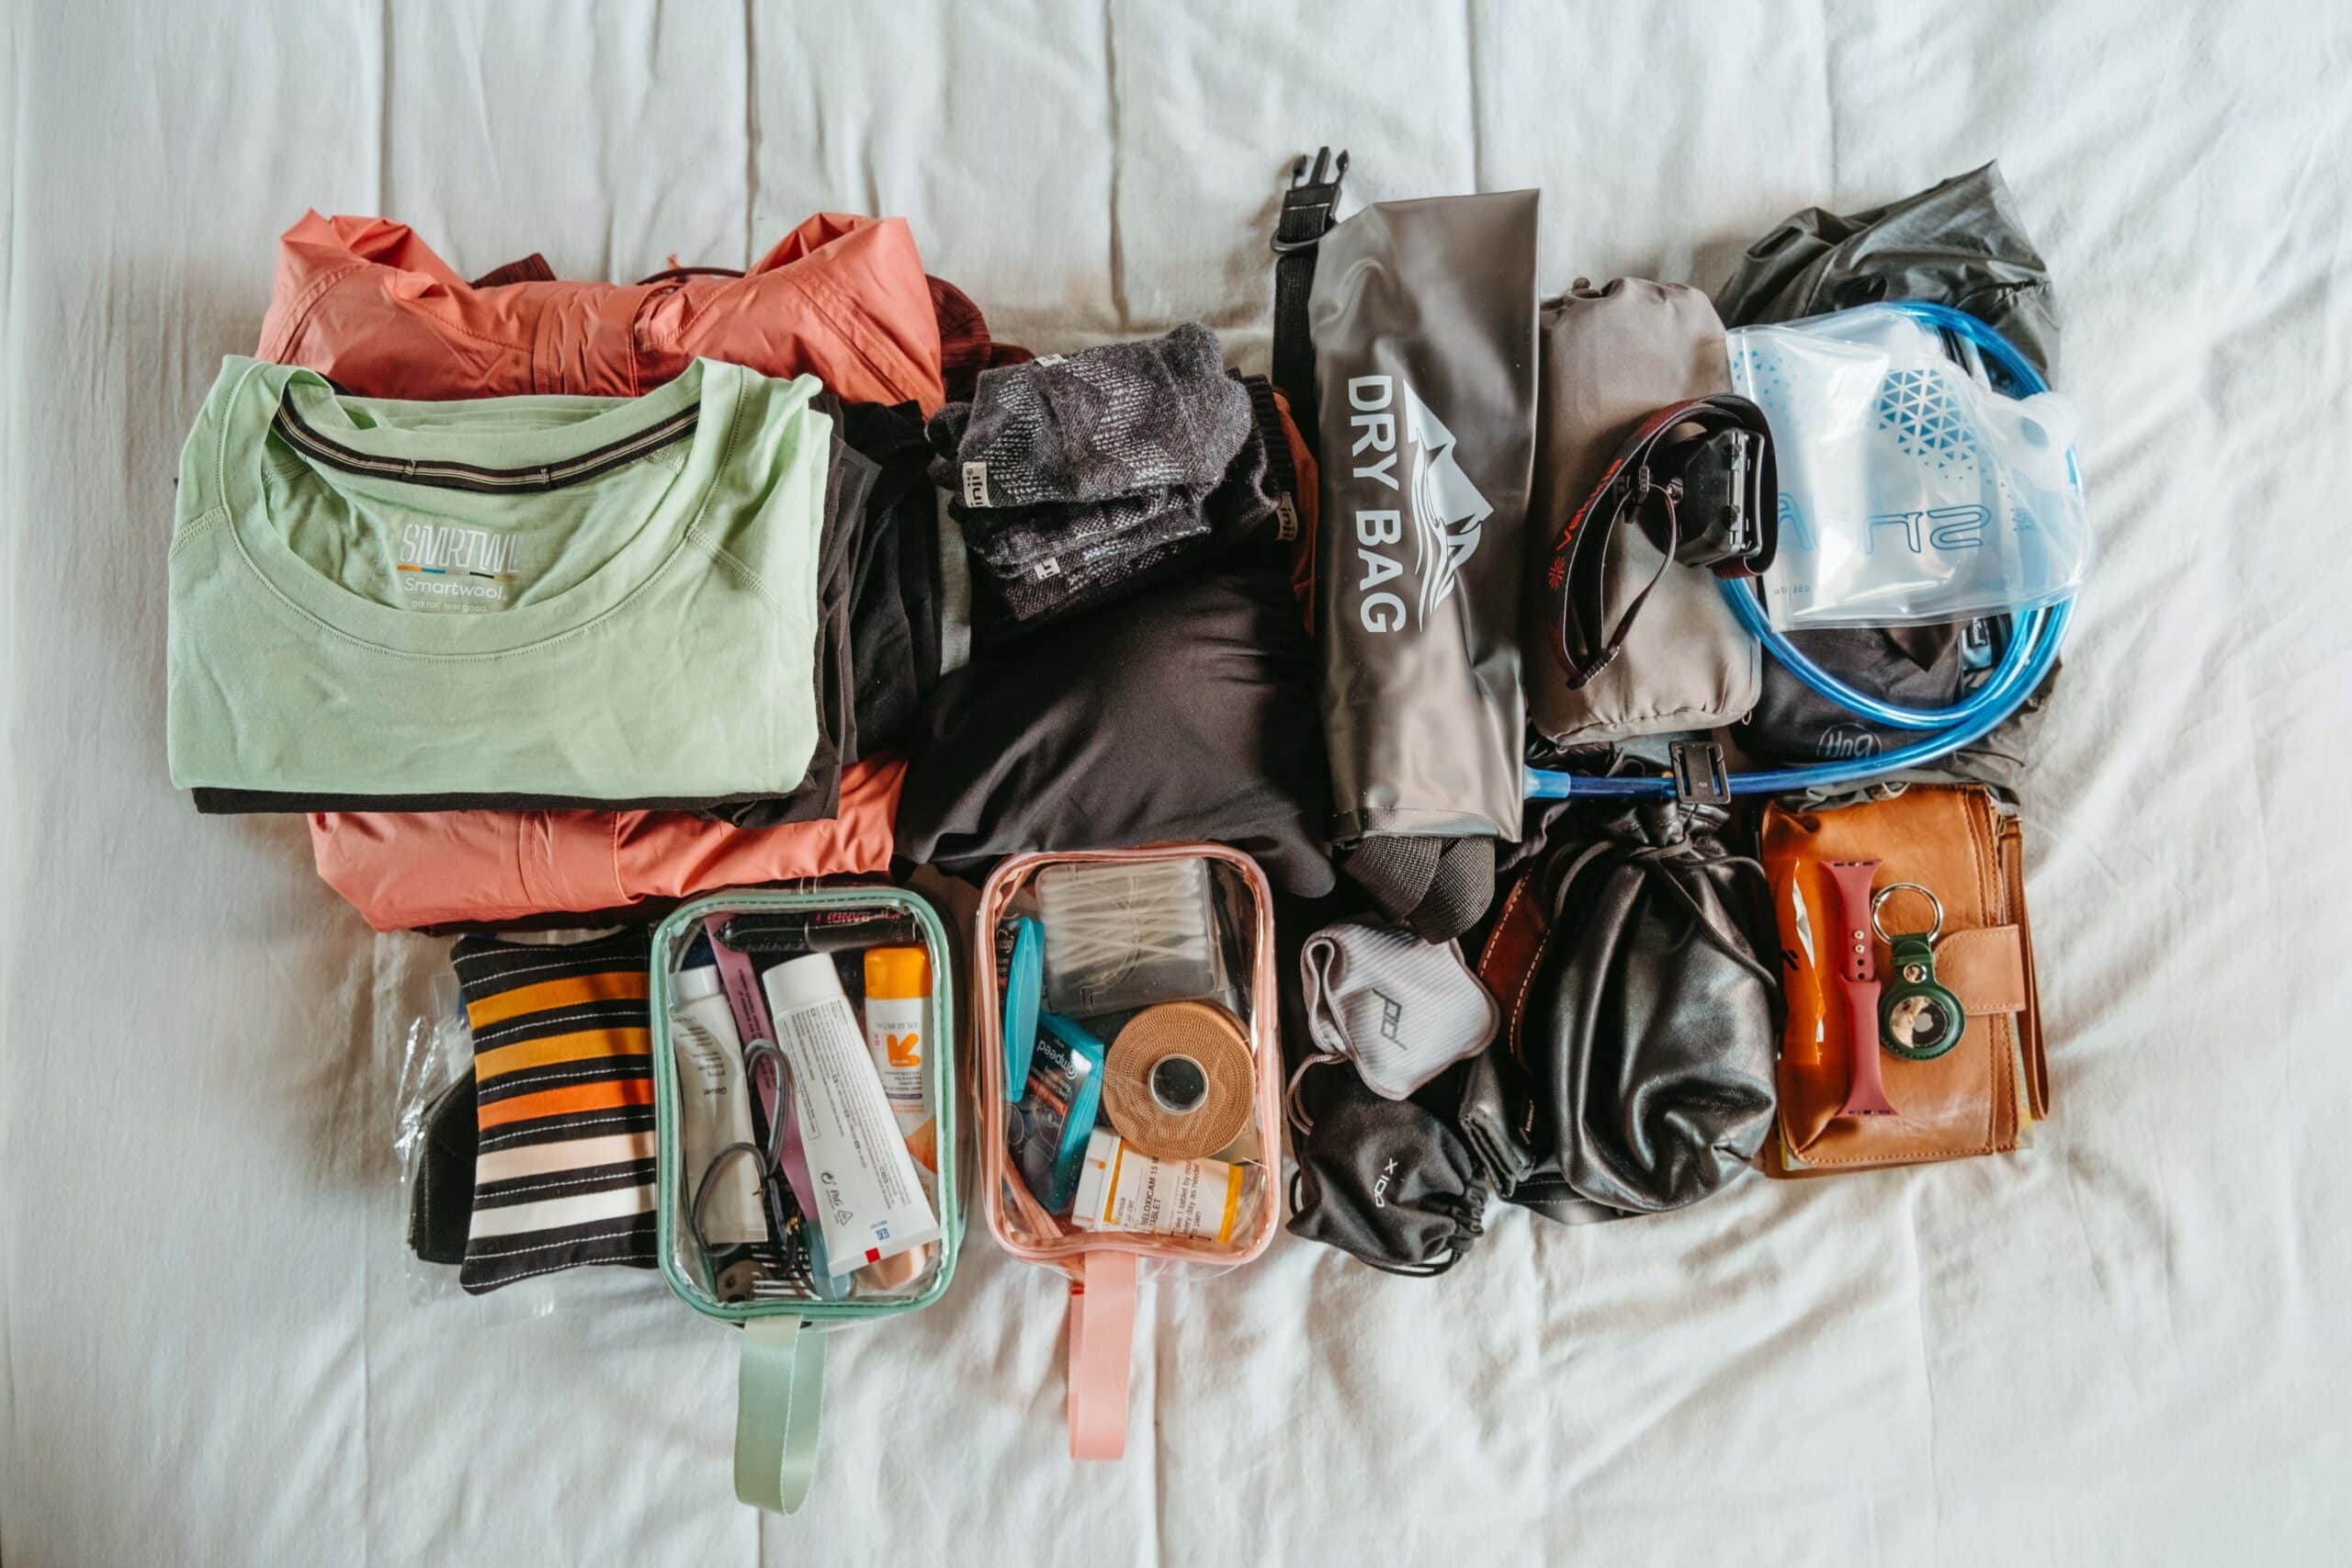
The Ultimate Camino Packing List (with A Printable Checklist!)
Walking the Camino de Santiago is a wonderful, life-affirming experience that I absolutely recommend if you have the time and the interest.
It’s also a challenging experience to pack for! You want to make sure you’ll be sufficiently clothed, clean, fed, and generally prepared, while carefully keeping your pack as light as you possibly can. This is no easy task! That’s especially true if you don’t have prior experience backpacking or long-distance hiking.
However, even if you’re a backpacking newbie (as I was before my Camino!), it’s completely possible to pack well if you listen to those with experience. That’s what I’m here for!
In this post, I’ll give you my thorough recommendations for how to pack for the Camino.
First, I’ll go through a few important, big-picture things to know about packing for the Camino.
Then, I’ll show you what I packed for my own Camino in June 2023 (including links to the exact products I used) — and tell you what I wish I would have done differently. I’ll also tell you how I would have adjusted my packing list had I walked in a different time of year.
Finally, at the end of this post, I’ll give you my complete recommended and PRINTABLE packing checklist for the Camino de Santiago.
Want to read more about the Camino?
Find my complete travel guide for the Camino de Santiago here.
This post contains affiliate links. If you make a purchase or a booking through one of these links, I may receive a small commission at no extra cost to you. Thanks for supporting In Old Cities in this way!
What to Know About Packing for the Camino
Before we get into specific items to pack, here some general things you need to know about packing for the Camino.
Is the Camino a wilderness hike?
No, the Camino is not a wilderness hike! This is not the Appalachian Trail, or the Pacific Coast Trail, or many other backpacking thru-hikes you may have heard about.
The Camino de Santiago (especially the very popular Camino Frances) is full of infrastructure, which means lots of small towns where you can stay in albergues (pilgrim hostels) or other lodging, eat at cafes, bars, and restaurants, and restock supplies. The Camino is also full of water fountains along the trail and many other opportunities to meet your needs.
This means that, unlike the AT or PCT, you do not need to carry a tent (in fact, it’s illegal to wild camp in Spain) or more food and water than you might need for a few hours. (I never needed to carry more than 2 liters of water on the Camino, and usually I carried less than 1 liter.)
How heavy should my backpack be for the Camino?
Your backpack and everything inside it should be as light as possible in other to prevent injuries and generally make your Camino easier. The common wisdom is that your pack and all its contents should weigh no more than 10% of your total body weight (not counting food and water).
For what it’s worth, my pack weighed about 20 pounds when I started (it was lighter by the end, as I ditched things along the way). This was quite a bit heavier than the recommended amount, largely because I chose to carry a few items (like my camera and Kindle) that were not strictly necessary, but enhanced my experience enough to be worth the extra weight.
What if I don’t want to carry my big backpack the whole Camino?
You don’t need to! The Camino has a number of services that will transport your pack from your starting point for the day to the albergue you’ll be staying in that night. These services include, among others:
- El Camino con Correos (this is Spain’s postal service)
- JacoTrans
- Caminofácil
Some of the Camino’s luggage transfer services require you to book all of your lodging in advance and give them the list of your accommodations (so that they know where to deliver your bag each day). I do not recommend this method of planning for the Camino, as it eliminates all flexibility (which is quite valuable on the Camino).
For this reason, I recommend using a luggage transfer service that allows you to decide where you will stay the next night with only limited notice.
Notably, you do NOT need to have your bag transported every single day, if you do not wish. Every albergue and hostel (and many hotels, as well) in towns along the Camino has special envelopes for luggage transfer services at their reception desks. If you decide you want to have your bag transported the next day, perhaps because it’s a particularly difficult hiking day or you’re nursing an injury, you can do this easily using the envelopes.
All you need to do is put the daily fee in the envelope in cash (in 2023, this was usually 6€ per day), fill out your name, contact information, and destination on the appropriate lines on the envelope, then attach the envelope to the bag you need to have transported. Then leave your bag near the door of the albergue or hostel on your way out.
The transport service will come collect your bag mid-morning and drop it off in the place you plan to stay that night. (Note that in order to take advantage of these services, you need to know in advance where you will be stopping for the day.)


Can I ship things to myself on the Camino?
Yes! If, after some time on the Camino, you decide that you don’t need to carry everything you packed, but you don’t want to get rid of your things entirely, you can use Spain’s postal system to ship items home or ahead to Santiago de Compostela.
I opted to do this in Burgos, about 1/3 of the way through my Camino. I sent ahead to Santiago about 2 pounds of items I didn’t need (below, I’ll tell you which ones!). This cost me 33€, and the post office in Santiago held my box for me until I arrived in the city a few weeks later.
If you wind up wanting to do the same, just take your items to any post office in Spain and tell them you need a “Paq Peregrino” (Pilgrim Pack) and that you want to ship things to be held for you in Santiago. They will ask when you plan to arrive in Santiago, so you should be prepared to give them a rough date even if you are not exactly sure. (They will charge you more to hold your package for longer.)
If you don’t speak excellent Spanish, you may wish to type this explanation into Google Translate in advance so you can show the postal worker what you need in Spanish (they may or may not speak any English).
What I Packed for the Camino de Santiago
The Absolute Essentials

- Backpack
- Trail runners
- Sandals
You can have a successful Camino experience without a lot of fancy gear, but if you splurge on anything, it should be (1) a good backpack, and (2) good shoes.
Backpack
I opted for the Osprey Sirrus 36L. (The L stands for liters — meaning how much volume the pack can hold). I tried it in the first place because I read that the Sirrus is especially good for women with short torsos (I’m only 5’1″!).
In my opinion, that turned out to be true — but I think the Sirrus would be good for taller women as well! It’s very adjustable and you can move where the straps sit on the frame of the bag so that the weight of the bag sits properly on your hips. (I kept the straps on the tightest possible setting.)
I loved this bag for other reasons too. It has a mesh frame that prevents the bag itself from resting on your back, meaning that there is airflow between your body and the bulk of the bag. I also thought it did a great job at distributing the weight of the bag away from my shoulders, and I found the pockets to be well-placed.


Shoes
I selected the Hoka Challenger 7 trail runners. Whether to wear trail runners, hiking boots, sandals, or some other type of footwear is hotly debated in the Camino community. I joined Team Trail Runners because I was persuaded that they would be the best fit for the varied types of terrains on the Camino (including lots of paved roads). I think this was right! I loved my Hokas and will probably buy the exact same pair for my next Camino, whenever that is.
The one thing I would and will do differently with respect to my shoes is to size up more. I did buy a wide pair (which is not my norm) in order to give myself more room in the toe box, but did not otherwise go up in size at all — and I did end up getting some blisters on my big toes and pinky toes. Next time, I will try sizing up a half size or potentially a full size and see if that helps to prevent blisters! (Some of my Camino friends swore by this method.)
I also want to note that I selected the Hoka Challengers after visiting REI and trying on MANY different pairs of shoes. It is absolutely critical that your shoes are as comfortable as possible, because the wrong pair of shoes has the power to totally ruin your Camino. So I do recommend visiting a store in person and trying a variety of brands and types of shoes, even if you ultimately purchase online!


My shoes on day 1 vs several weeks later
I also packed a pair of lightweight, squishy sandals to wear in the evenings and on rest days. These were absolutely critical for at least two reasons.
First, most albergues, hostels, etc. make you take your walking shoes off when you arrive and store them in a place that’s separate from where you are sleeping — so you need a second pair of shoes anyway.
Second, you will want to give your feet a break and wear different shoes in the evening than the ones you walked in all morning. I recommend that they be extremely comfy, like the ones I wore.
And for a bonus reason, it’s also a good idea to have a pair of shoes that you can wear into the shower — a LOT of people use those things!
Clothing
Before we get into specifics, an important thing to know about clothing on the Camino:
You can wash your clothes every day. Anywhere you stay on the Camino should have places for pilgrims to wash their clothes. (Certainly, all albergues do.) Accordingly, here was my routine: every afternoon, after checking into my accommodation for the night, I would shower and put on my one clean outfit. Then, I would wash the clothes I had hiked in that morning. Typically, I washed by hand — many albergues and hostels have laundry machines, but you almost always need to pay to use these. (They usually cost around 5 euros per load, which adds up quickly!).
Because you can wash your clothes every day, you don’t need to pack much at all. As you will see, for example, I packed only two shirts. At all times, one was on my body and the other was either drying on the clothesline (if I was settled in my albergue for the night) or packed away in my bag (if I was hiking).
The other implication here is that you want clothes that are fast-drying (or else you will be packing damp clothing in your bag each morning!). Merino wool is great for this — and, bonus, it smells better, too.
Now, here’s what I packed.

- Windbreaker
- Lightweight fleece jacket
- 2 merino wool short-sleeved shirts
- 2 pairs of leggings
- 1 skirt
- 3 pairs of merino wool underwear
- 2 merino wool sports bras
- 3 pairs of merino wool hiking socks
- 1 pair of normal socks
- 1 shirt and 1 pair of shorts for sleeping
- Packing cubes
Jackets
I carried two jackets: a windbreaker and a fleece jacket.
The windbreaker was certainly necessary: mornings and evenings were often chilly, and the hood was helpful when it rained.
I’m still going back and forth on whether my fleece jacket was worth carrying. I used it a few times — mostly, during the evenings and nights I was in high-elevation areas — and I was always really glad for it when I had it. However, it was not necessary the vast majority of the time, and I likely would have been fine had I just worn my windbreaker instead. Since my fleece jacket was one of the heaviest items of clothing in my pack, I probably should have shipped it ahead in Burgos.
If I were to walk in the spring or the fall, when the weather is cooler, I would definitely keep the fleece.
Tops
I went very minimal on tops: two lightweight merino wool shirts from SmartWool. I simply alternated these each day and I highly recommend them. They are extremely lightweight and comfortable, and they dry quickly (a huge plus on the Camino!)
If I walked in the spring or fall, I might add a long-sleeve merino wool shirt for an additional layer.
Bottoms
For bottoms, I took two pairs of basic leggings and one skirt (with shorts built in).
On my next Camino, I will strongly consider simply taking two pairs of zip-off hiking pants instead (like these or these). My leggings were great in the early mornings and the evenings, when it was often cool, but by mid-day, I was typically hot. On the days I wore my skirt instead, I was typically cold when I started walking but comfortable by mid-day. Zip-off pants may not be the cutest of choices (not that anyone cares about this on the Camino anyway!), but they would have the advantage of being adaptable for multiple temperatures. (Heads up, though, that they tend to be a bit heavier due to the zippers.)
If I were to walk in a cooler season, I would definitely skip the skirt and stick to two pairs of leggings or hiking pants.
Underwear and bras
No matter the weather, 3 pairs of underwear and 2 sports bras are sufficient for the Camino thanks to the clothes-washing routine I explained above. Actually, 2 pairs of underwear would probably have been enough, but it’s nice to have a third pair just in case (and they are so lightweight).
For both underwear and bras, I chose merino wool items from SmartWool. They were lightweight and very fast-drying. I loved the underwear so much, in fact, that I purchased more pairs to take with me on my year of travel around the world! (Unfortunately, the bra style I chose has been discontinued. I’ve tried the new version and it doesn’t work for me — it’s WAY too long, and the band rolls up constantly — but if you are tall, maaaaaybe it will work for you?)
Socks
There are many theories on the best sock methods for the Camino. Some people just wear one pair of regular hiking socks, and that’s it. Some people wear two layers of socks — a thin liner pair under a thicker wool pair. Some people swear by toe socks. Some people combine these methods, wearing a thin liner pair of toe socks under merino wool hiking socks. (The one thing I think just about everyone agrees on is that you shouldn’t wear simple cotton socks!).
I went with two pairs of these midweight Injinji toe socks (no liner pair), and I absolutely LOVED them. The separation of my toes was crucial after I developed some blisters on the outsides of my big toes and pinky toes — I walked with those toes pretty thoroughly wrapped up in blister care materials (more on that below!) for much of the Camino, and the toe socks prevented the bandages from rubbing against my unblistered toes and causing other blisters. I would absolutely walk with these same socks again.
I also packed one longer pair of the same type of socks, but this was overkill (they were too hot, and I needed only two pairs anyway), and I sent them ahead in Burgos.
I also carried one pair of regular cotton socks — not toe socks, and not for hiking. I wore these when it was chilly in the evenings. The only reason I needed these was because I wore open-toed sandals in the evenings (see above), and wearing sandals with toe socks is really not the move.
Sleeping clothes
I appreciated my sleeping shorts on warmer nights, but didn’t want or need them enough to justify the weight. The sleeping shirt was totally unnecessary, as I could always just sleep in the next day’s hiking shirt. I sent both of these items ahead in Burgos.
Packing cubes
I carried all my clothing in Monos compressible packing cubes — a large one for my tops, bottoms, and jackets, and a small one for my socks and underwear.
One last thing on clothing.
Some people take one non-hiking outfit to wear in the evenings and on rest days. I did not do this and simply wore my hiking clothes at all times. I think both of these options are perfectly reasonable — it just depends whether having one nicer outfit is, to you, worth the extra weight.
I think on a future Camino, I might consider taking something like one very lightweight romper or perhaps a thin dress.
Toiletries & First Aid

- Shampoo & conditioner
- Deodorant
- Toothbrush & toothpaste
- Dental floss
- Moisturizer
- Lotion
- Razor
- Comb
- Sunscreen
- Retainers
- Nail clippers
- Hair ties and bobby pins
- Small amount of makeup
- Cough drops
- Chapstick
- Tissues
- Tampons and panty liners
- Compeed
- Blister care pack
- In-shoe blister patches
- Tape
- Medication
- Q-tips
- Bandaids
- Melatonin
- Tums
- Anti-diarrheal meds
I packed all of my toiletries and first aid supplies in these clear cosmetics bags (toiletries in one, first aid in the other).
Toiletries
I took what I personally consider to be (nearly) the bare minimum for toiletries: shampoo and conditioner (in these bottles), deodorant, toothbrush and toothpaste, dental floss, facial moisturizer, lotion, a razor, a comb, and sunscreen. Nothing special — whatever you use in normal life will do. I traveled with small amounts of shampoo, conditioner, and moisturizer, and needed to replenish these at stores along the way (which was easy to do).
I wear retainers at night, and packed these as well.
I also packed nail clippers, bobby pins, and a few extra hair ties (all of which were necessary) and a small amount of makeup. (Travel size concealer and mascara, plus a brow pencil.) The makeup, of course, was unnecessary, but it was nice to have for evenings and rest days.
Finally, I carried cough drops, tissues, and Chapstick in the hip pockets of my bag (so they were easily accessible while walking). All were critical!
Menstrual supplies
A word about what you should take for dealing with your period, if relevant: first, if you have a regular period and you’re planning to walk for at least a month, it’s nearly inevitable that you’ll get your period at least once during the Camino. However, be aware that this amount of exercise (assuming it’s not your norm) can also throw off your cycle, so your period may come late or early and be heavier or lighter than you’re used to.
For this reason, it’s a good idea to pack at least a small amount of supplies with you (and not just plan to buy supplies shortly before you expect your period to arrive). If you don’t want to carry any extra weight at all, just pack the bare minimum of supplies (depending what types of products you like to use, I would suggest at least two tampons and a pad or panty liner) and then buy more once your period does arrive.
While people in Spain of course get their periods too, and so you can buy products as you go, if you’re dependent on a certain product (such as a particular brand of tampon), I recommend packing all that you need from the beginning, because you may not be able to find it along the way.
Let me also note that, with very few exceptions, it is not difficult to find bathrooms along the way. Most days, you will walk through multiple towns that have restaurants and other places with bathrooms for you to use.
First aid
The good news about first aid on the Camino is that it’s easy to access the supplies you need: every town you walk through, even the tiniest ones, is likely to have at least one store with basic (or serious!) first aid supplies. Many towns, especially the larger ones, have substantial pharmacies and clinics staffed by people who are very experienced at helping pilgrims resolve their various physical maladies.

That said, it’s a good idea to travel with a few particular supplies from day one. Specifically, you really never want to be without supplies for treating blisters. This is because the moment you start to feel a hot spot on one of your feet, it’s critical to stop immediately and do your best to prevent that hot spot from turning into an active blister. (Sometimes by the time you feel the spot, it’s already a blister, and in this case you ESPECIALLY want to get products on it immediately!)
My favorite product for blister care on the Camino is Compeed. These are cushioned patches that stick directly to your skin and remain there for several days (until they start to fall off on their own).
Compeed comes in a variety of shapes and sizes, and it’s a good idea to carry several different types with you because you don’t know where your personal hot spots will arise. Maybe it’ll be your pinky toe, and you’ll want the small but long wraparound patch. Or maybe it’ll be your heel, and you’ll want the large, oval patch. Etc.
I recommend carrying at least one of these variety packs of Compeed. If you run out, it is extremely easy to find more Compeed throughout the Camino (every pharmacy has it), so do not stress about the amount you have at the beginning. You only need enough to handle any initial blisters.
About a week in, I also bought one of these blister care packs at a pharmacy, and found it very useful. I developed my own system for layering these products with Compeed that worked to cover my worst hot spots while walking (and you will do the same!).
Additionally, I took these in-shoe patches, which were extremely helpful (and ultimately necessary). They are meant to prevent blisters by covering over any points of friction within your shoes themselves. I used them to cover up spots within my shoes that were starting to wear down from overuse.
I also walked with sports tape (unnecessary), pain medication (necessary), Q-tips (helpful), Band-aids (necessary), melatonin (helpful), Tums (unnecessary), and anti-diarrheal meds (unnecessary). I sent the tape, Tums, and anti-diarrheal meds ahead in Burgos.
Technology

- Camera
- Extra camera battery
- Extra SD card
- Camera case
- Lens wipes
- Camera cover
- Camera clip
- SD card reader
- Kindle
- Earbuds
- Electronics cords
- Electronics case
- 2 plug adapters
- External charger
Camera (and accessories)
Most people walk the Camino with only their phone’s camera, which is completely fair: phone cameras are great these days, and totally sufficient for most people’s needs.
However…for all sorts of reasons, I couldn’t imagine walking the Camino without one of my “real” cameras. My personal compromise was to take my lightest and smallest camera and only its most necessary accessories.
This meant that I carried the following essential objects: a Fujifilm x100v, two camera batteries, and two SD cards. I packed the camera in a neoprene case so it was protected while in my backpack and day bag and carried several microfiber cloths to clean my lens.
Importantly, I wanted my camera to be easily accessible while I was hiking. To achieve this, I used the Peak Design camera clip, which I absolutely LOVED. One part securely attached to my backpack strap, and the other to my camera. This clip allowed me to carry my camera on my backpack strap and easily detach it whenever I wanted to take a photo. It was perfect!

I also carried the Peak Design rain cover. Due to a surprising lack of rain on my Camino, I rarely used this, but it was helpful in the event of light drizzle.
Finally, I walked with this SD card reader, which allowed me to plug my SD card into my phone and import my photos each day.
Other tech
I brought my Kindle, which was 100% a luxury. I didn’t use it every day, but sometimes I read to fall asleep at night. I carried my Kindle in this lightweight and convenient case.
I also walked with a portable charger for my phone, which was not often necessary (but absolutely critical when I did need it), and two small plug adapters. (I only needed one and left one of them behind very early on.) I recommend taking a plug adapter like this, which has USB outlets.
Naturally, I also carried cords for my Kindle, Apple watch, and phone. (My camera and Kindle both charge with USB-C cords, so I used the same cord to charge both of those items.)
I carried all of this tech, aside from the Kindle itself, in a lightweight case similar to this one.
I also walked with wired earbuds (which I stored in a hip pocket for accessibility). I did not take my AirPods because I felt like I already had so many things that needed to be charged, and I didn’t want to deal with running out of power while walking. This turned out to be the right call for another reason: Bluetooth does not always work great in the more remote sections of the Camino, and friends who walked with AirPods found that they sometimes stopped working on the trail.
Other Stuff

- Day bag
- Water bladder
- Sunglasses
- Buff
- Baseball hat
- Poncho (large enough to cover both me and my pack)
- Sleeping bag liner
- Head lamp
- Towel
- Stone from my grandparents’ garden
- Journal & pen
- Guidebook
- AirTags
- Wallet
- Credencial
- Walking sticks
- Laundry detergent and clothesline
- Extra Apple watch bands
- Plastic bags (one with toilet paper)
- Spork
- Earplugs and eye mask
- Dry bag
Day bag
I took this extremely lightweight and collapsible Osprey backpack to use in the evenings and on rest days. This was critical — I always needed something to carry my wallet, camera, journal, credencial, and guidebook when I went out.
Water bladder
Most pilgrims seem to hike with water bottles that they carry in their backpacks’ side pockets, but I took a 1 liter water bladder. I loved it! The hose clipped easily to my backpack strap, so my water was always easy to access without having to interrupt my stride. (Helpfully, my backpack had a pocket in the interior that held the bladder easily, plus a hole in the back for the exact purpose of threading a water hose.)
For what it’s worth, with the way my backpack fit me, I could not reach into the side pockets while I was walking. If I had walked with a bottle instead of the bladder, I would have needed to stop and remove my backpack every time I wanted to take a drink (if I was walking alone, at least). Annoying! I was so happy to have the water bladder instead.
Sunglasses, buff, and baseball cap
In the category of “keeping the sun/my own hair out of my eyes,” I carried sunglasses, a buff, and a simple baseball cap. I rarely wore the sunglasses, instead much preferring the baseball cap (which handled both the sun and my hair quite nicely).
I went with this buff, which is quite lightweight and comfortable, and then promptly left it hanging on an albergue clothesline after the very first time I wore it. I replaced it with a new buff from a pilgrims’ supply store, but this was probably a waste of money, as I rarely wore it.
On future Caminos, I will probably only take the hat.
Poncho
Incredibly, my poncho turned out to be total dead weight. While there was plenty of rain in the late afternoons and evenings, I never had any serious rain while I was actually walking. In fact, I only got my poncho out one time, and that rain turned out to be so brief that the poncho was unnecessary in the end.
Of course, I had no reason to know this would be the case when I was packing, or at any point during my Camino (otherwise, I would have sent my poncho ahead to Santiago when I shipped a package in Burgos!).
Pilgrims should always assume they will have rain while walking, and be prepared for it. Options include packing a large poncho, like me, or some combination of a quality rain jacket and rain cover for your pack.
At the very least, you will want to have something reliable to protect your pack in the event of rain. (Many packs, including mine, come with a built-in rain cover, so check your pack before you purchase something additional.)
Sleeping bag liner
Unless you are planning to stay in hotels for your entire Camino, you should pack some sort of sleeping bag or sheet. Albergues will typically provide a pillowcase and fitted sheet for your mattress, but may or may not provide any other type of sheet or blanket.
Because I was walking in the summer, I went with this lightweight sleeping bag liner (imagine that your sleeping bag is just a sheet, and that’s what you’ve got).
If I was walking in the spring or the fall, I might take an actual sleeping bag.
Head lamp
My head lamp is one of those things that I didn’t use a lot, but I really needed it when I did use it. Specifically, I used my head lamp when I got up and started walking well before sunrise. (Tip: use the red setting if you need to use it to pack your bag in a dorm room where other people are still sleeping; it’s bright enough to see your stuff, but not so bright that you’ll wake up the others.) I would never walk the Camino without one of these.
Towel
Do not walk the Camino without some kind of towel; they are almost never provided in albergues or hostels.
I went with the PackTowl microfiber towel, which was very lightweight and fast-drying and came with its own carrying bag. I got the Hand size, which was was large enough to do the job but still quite small for packing purposes.
Stone
A stone might seem like a strange object to take on a hiking trip, but there was a good reason.
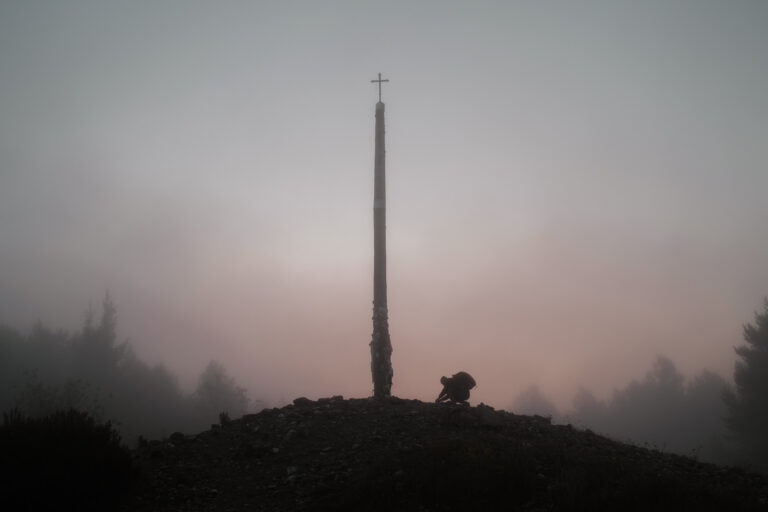
Near the end of the Camino Frances, pilgrims reach a place called Cruz de Ferro — a cross installed around the highest point of the Camino Frances. Tradition (whether recent or ancient, I do not know) holds that pilgrims carry a stone throughout the Camino (or find one along the way) and leave it at Cruz de Ferro.
For many people, this is a highly meaningful moment, and some people choose to imbue their stones with symbolic meaning representing burdens they wish to lay down.

Journal and pen
This was another luxury, of course, but it was important to me. I journaled each day, writing down notable moments I wanted to remember, people I had met, my route for the day, and personal reflections.
I used this refillable journal, which was sturdy without being too heavy.
AirTag
If you’re an iPhone user, I highly recommend traveling with AirTags in your important stuff. These little discs allow you to track your stuff in the event that it’s lost.
I put one AirTag in my backpack, and another in my wallet.
Wallet
Speaking of my wallet, I took a small, lightweight wallet that contained: an AirTag, my passport, my COVID vaccination card, my debit card, and two credit cards. Once I arrived in France, I also took out some euros from an ATM. You will always want to have some cash with you on the Camino, as some cafes and albergues don’t accept cards.
Credencial and shell
Upon arrival in St. Jean Pied de Port, I visited the pilgrims’ office, where I purchased a credencial — that is, a pilgrims’ passport. This is a necessary item in order to receive a compostela (certificate of completion) in Santiago de Compostela.
Along the way, I stamped my credencial at every place I stayed, plus other significant places (for example, some churches I visited). At the end of the Camino, my credencial served as proof that I had walked the entire way.
You can order a credencial in advance, but they are easy to find along the way if you don’t have time for it to arrive, or would prefer to have one from one of the locations on the Camino. If you order one in advance, I recommend bringing it along in a sturdy plastic bag for protection (the office in SJPdP gave me a bag for mine).
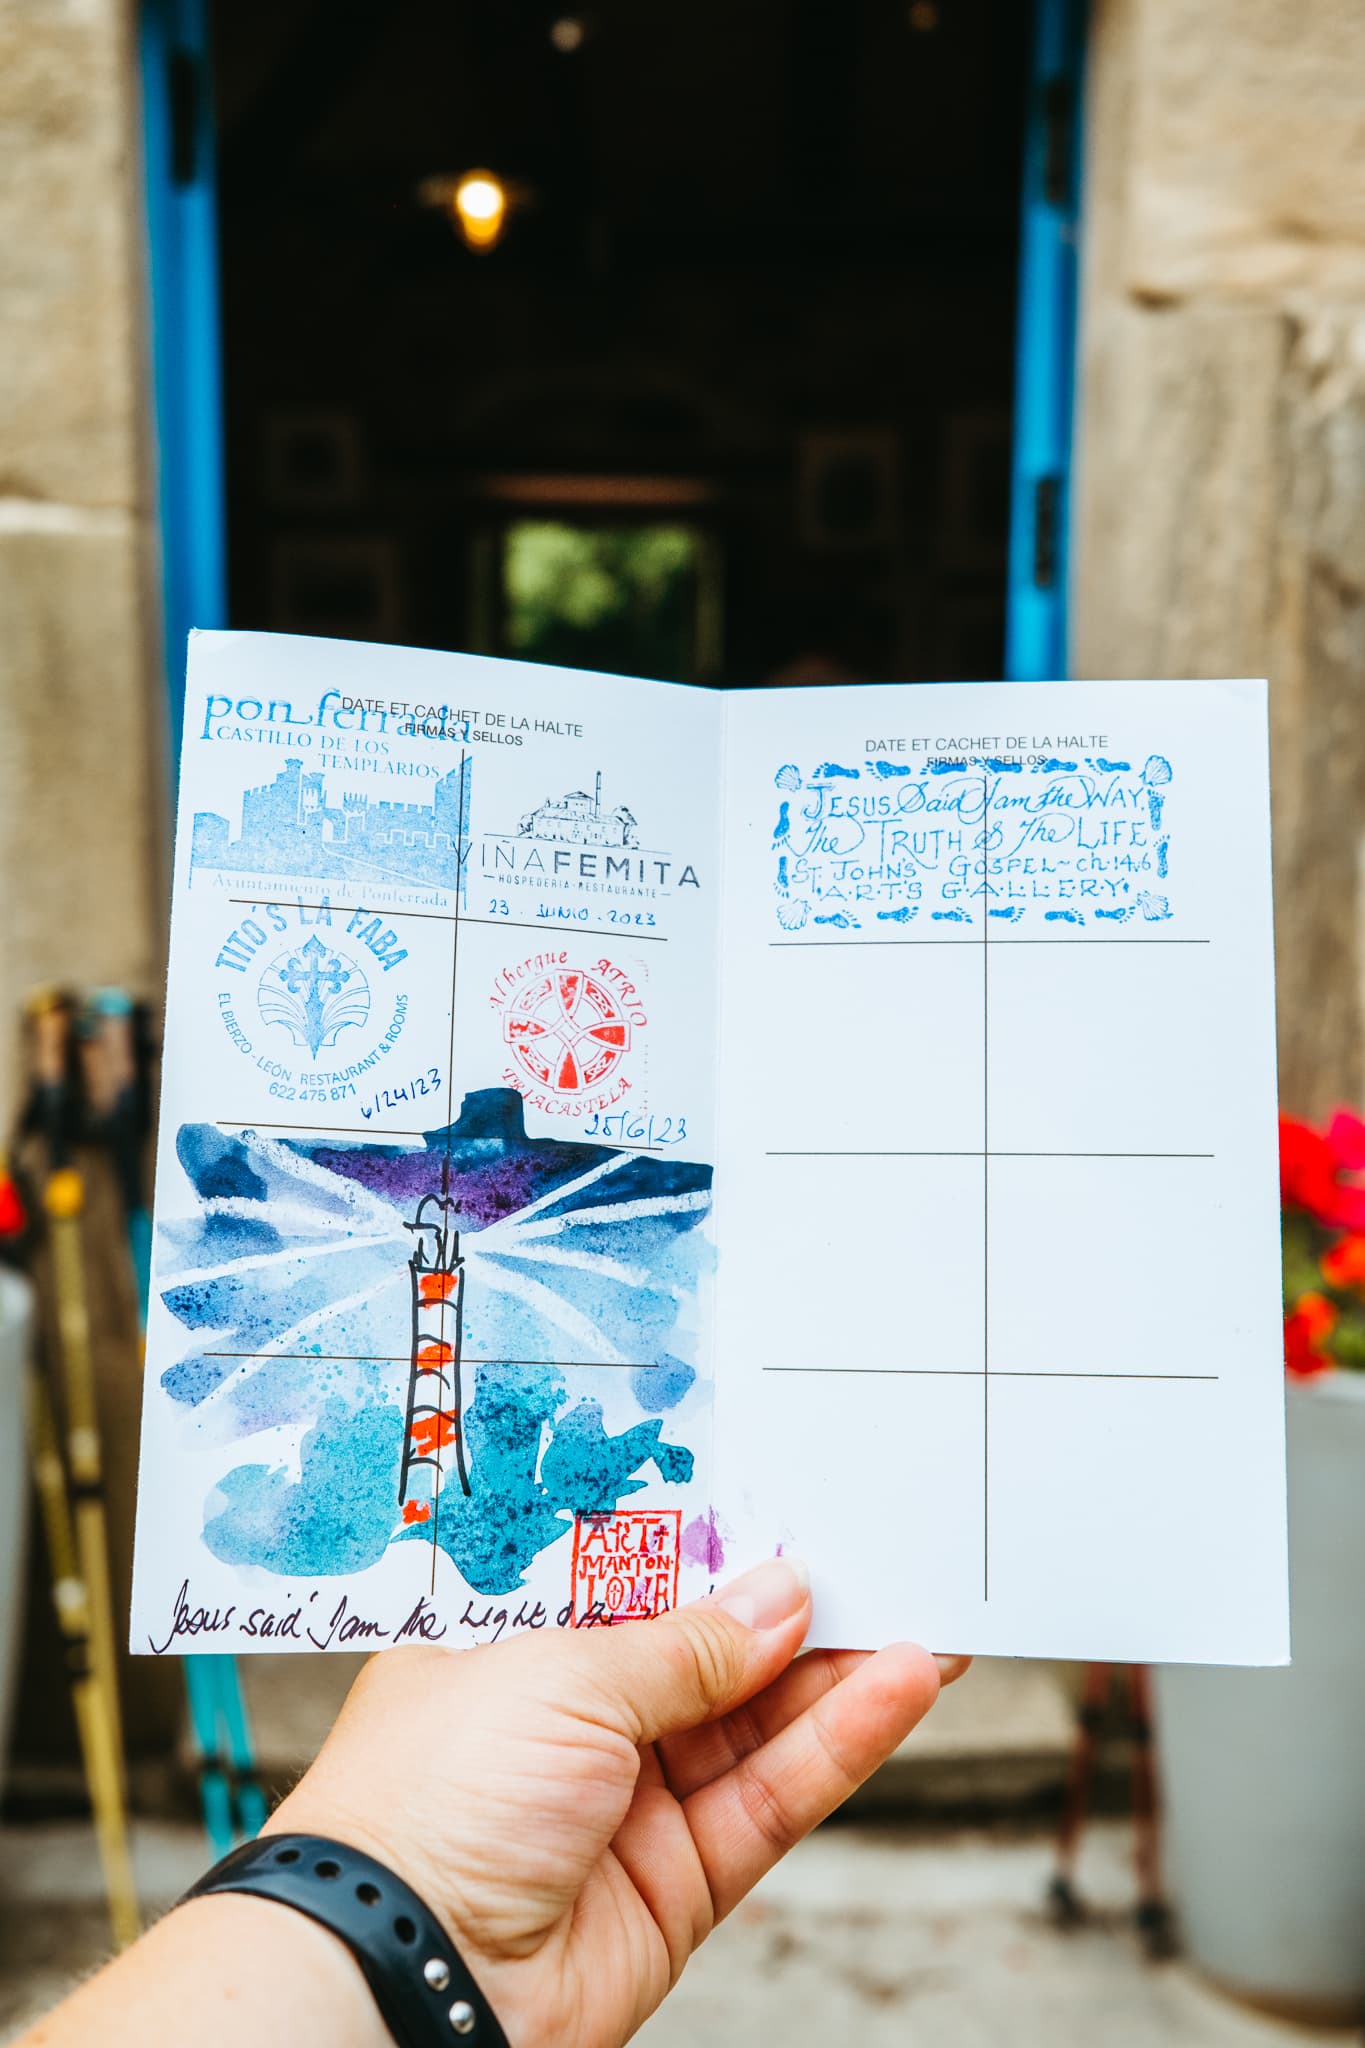
The shell is a Camino symbol, and many people carry one on their bags. I bought one of these in the pilgrims’ office in SJPdP too.
Walking sticks
I bought my walking sticks when I arrived in Saint-Jean-Pied-de-Port. There are several pilgrims’ stores in SJPdP, and it is easy to find walking sticks at any of them. Mine cost 9€ per stick.
If you are planning to carry your pack onto your plane (as I did), you should also wait to buy your sticks until you arrive, as many airports will confiscate walking sticks or require you to check them. Note that many of the towns and cities on the Camino have pilgrims’ stores, so there are plenty of places you can find walking sticks even if you are not starting in Saint-Jean.
Laundry supplies
I picked up a miniature bottle of laundry detergent and a packable clothesline at a pilgrims’ store in Saint-Jean.
The laundry detergent was absolutely necessary, since I opted to hand wash my clothes most days, and not every albergue had soap.
The clothesline was not necessary, since every albergue did have places to hang my wet clothing, and I sent it ahead in Burgos.
Apple watch bands
I took an extra pair of Apple watch bands, just in case my primary pair broke. (This did not happen, and so they were unnecessary.)
Guidebook
Not everyone carries a guidebook on the Camino — lots of people just use their phones to look up things, or make plans, as they go, but I really loved having a physical book to look at. I used it multiple times every day!
I carried this thin and lightweight map guide by Anna Dintaman and David Landis. It added barely any weight to my pack, but gave me daily maps and elevation guides, plus lists of albergues in every town. I found it to be invaluable.

Plastic bags and toilet paper
I took two small sandwich baggies — one empty, and one with toilet paper. This was so I would be prepared if I needed to relieve myself out on the trail. I strongly recommend doing the same!
Spork
I bought a spork in a pilgrims’ supply store in Astorga after wishing I had one a few times along the way. However, I think I only used it once or twice after that, so I’m not sure I can really say it was worth the money and the (minimal) weight.
Ear plugs and eye mask
I kept the ear plugs and eye mask Delta gave me on my flight to France. I never used the eye mask, but I used the ear plugs OFTEN. (When you share dorm rooms with other pilgrims, you ARE going to encounter snorers!)
Dry bag
Finally, I took this dry bag, thinking that I might want to take my wallet and camera into the shower with me (rather than leave them unattended in dorm rooms).
And then I never ever used it. I just did not worry that my fellow pilgrims were interested in robbing me! Accordingly, I sent the dry bag ahead in Burgos.
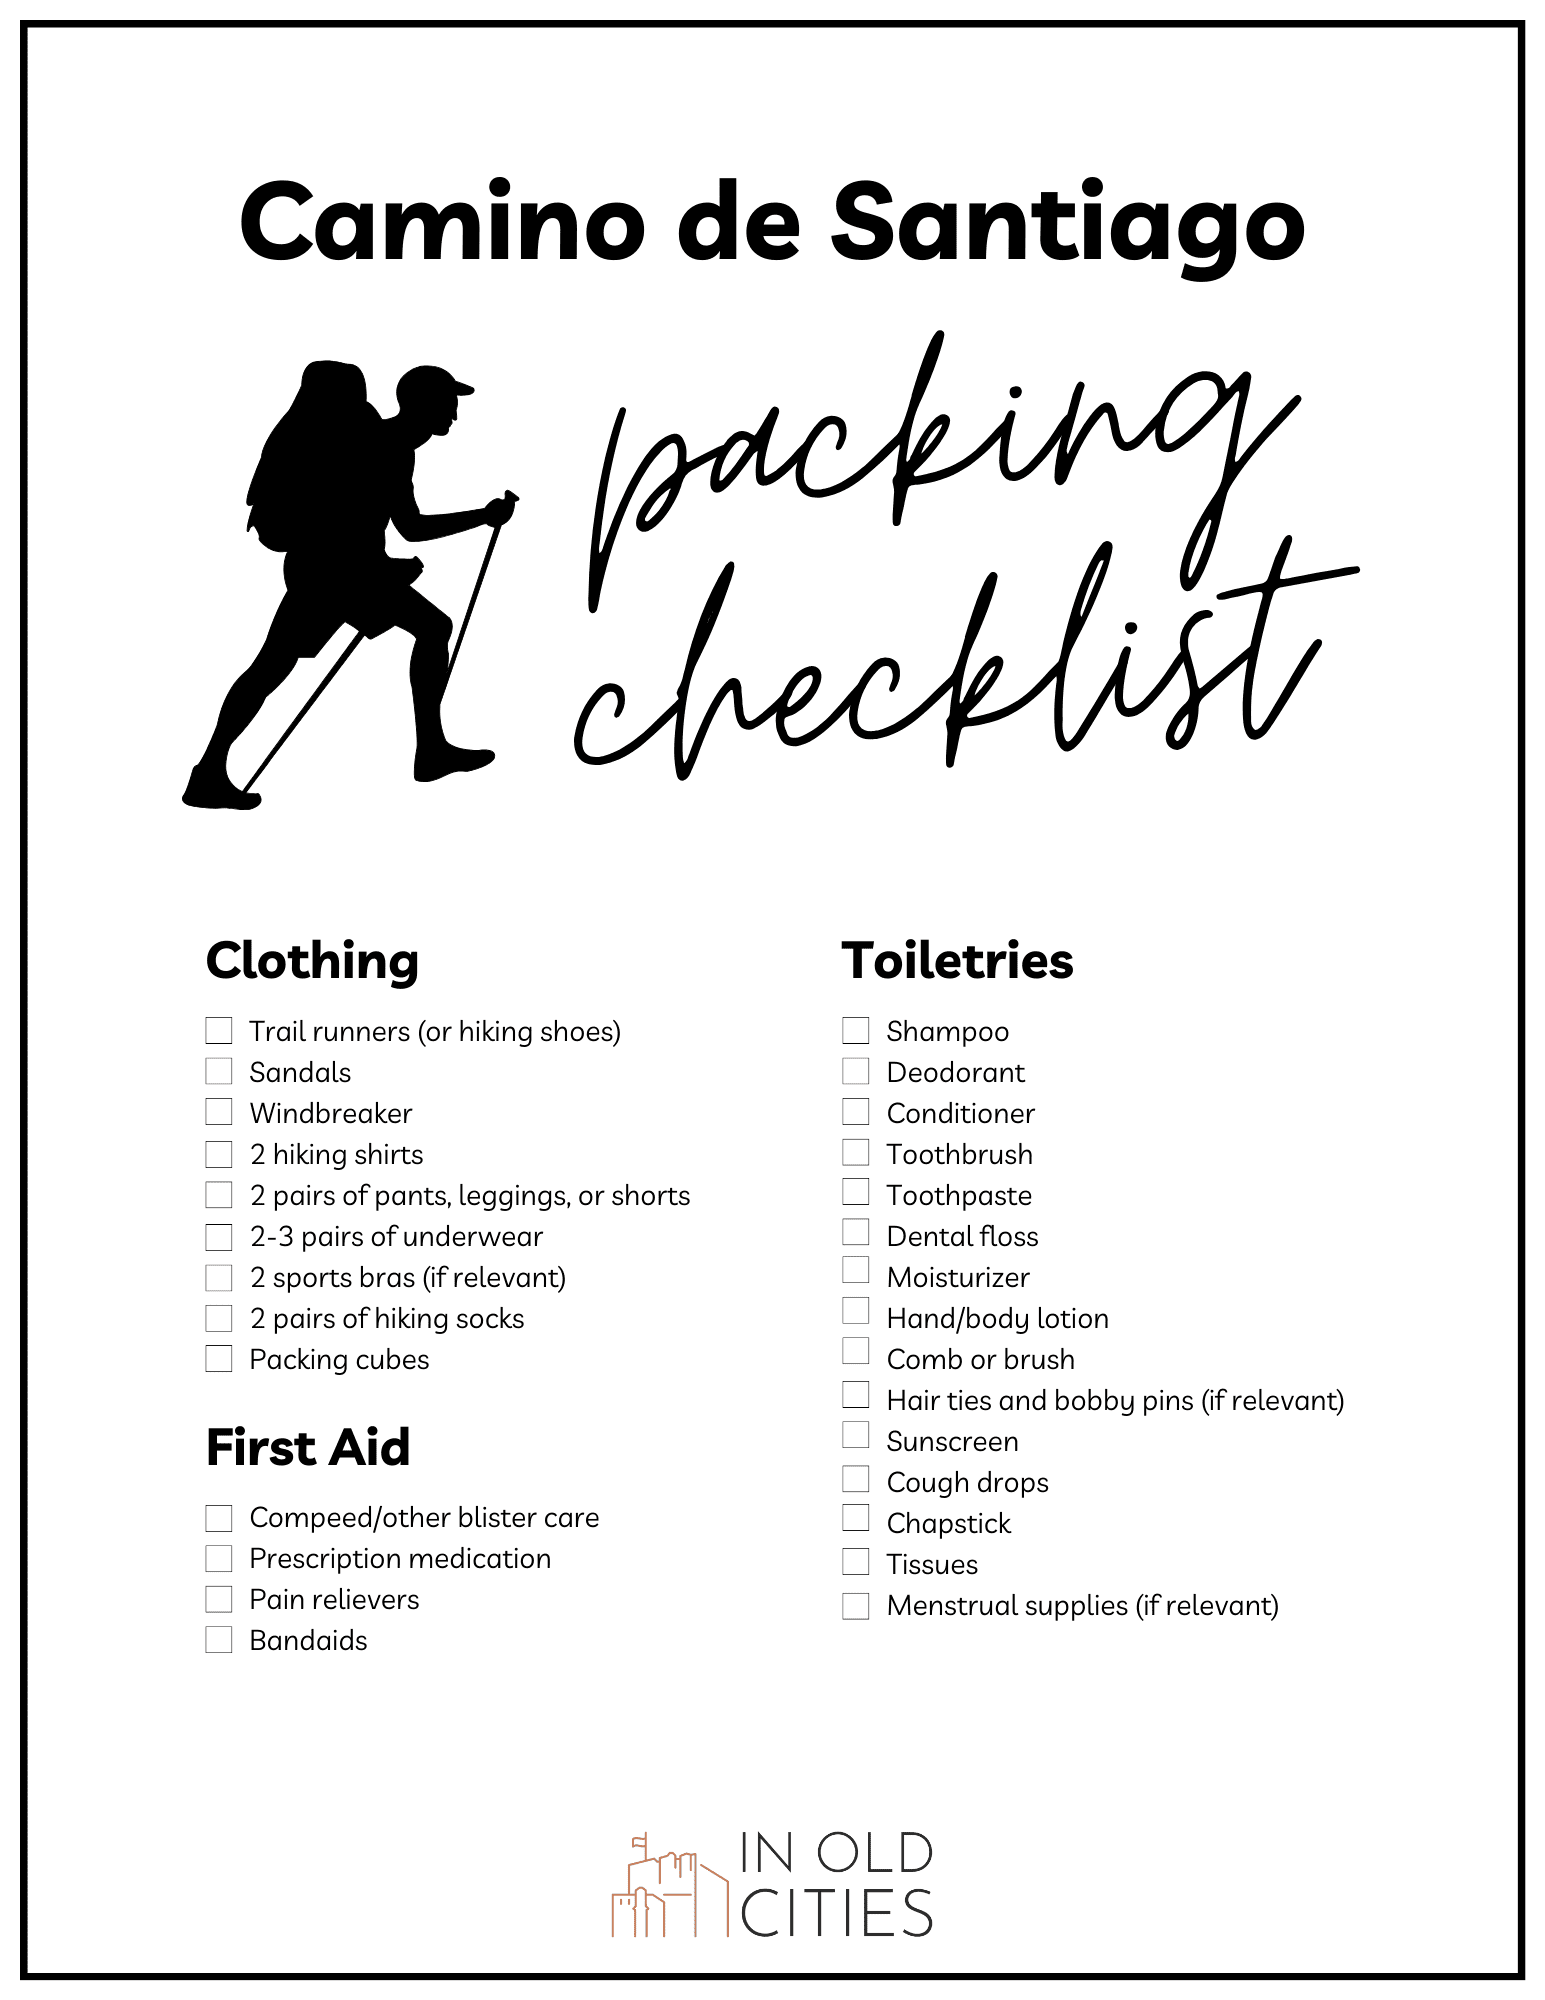
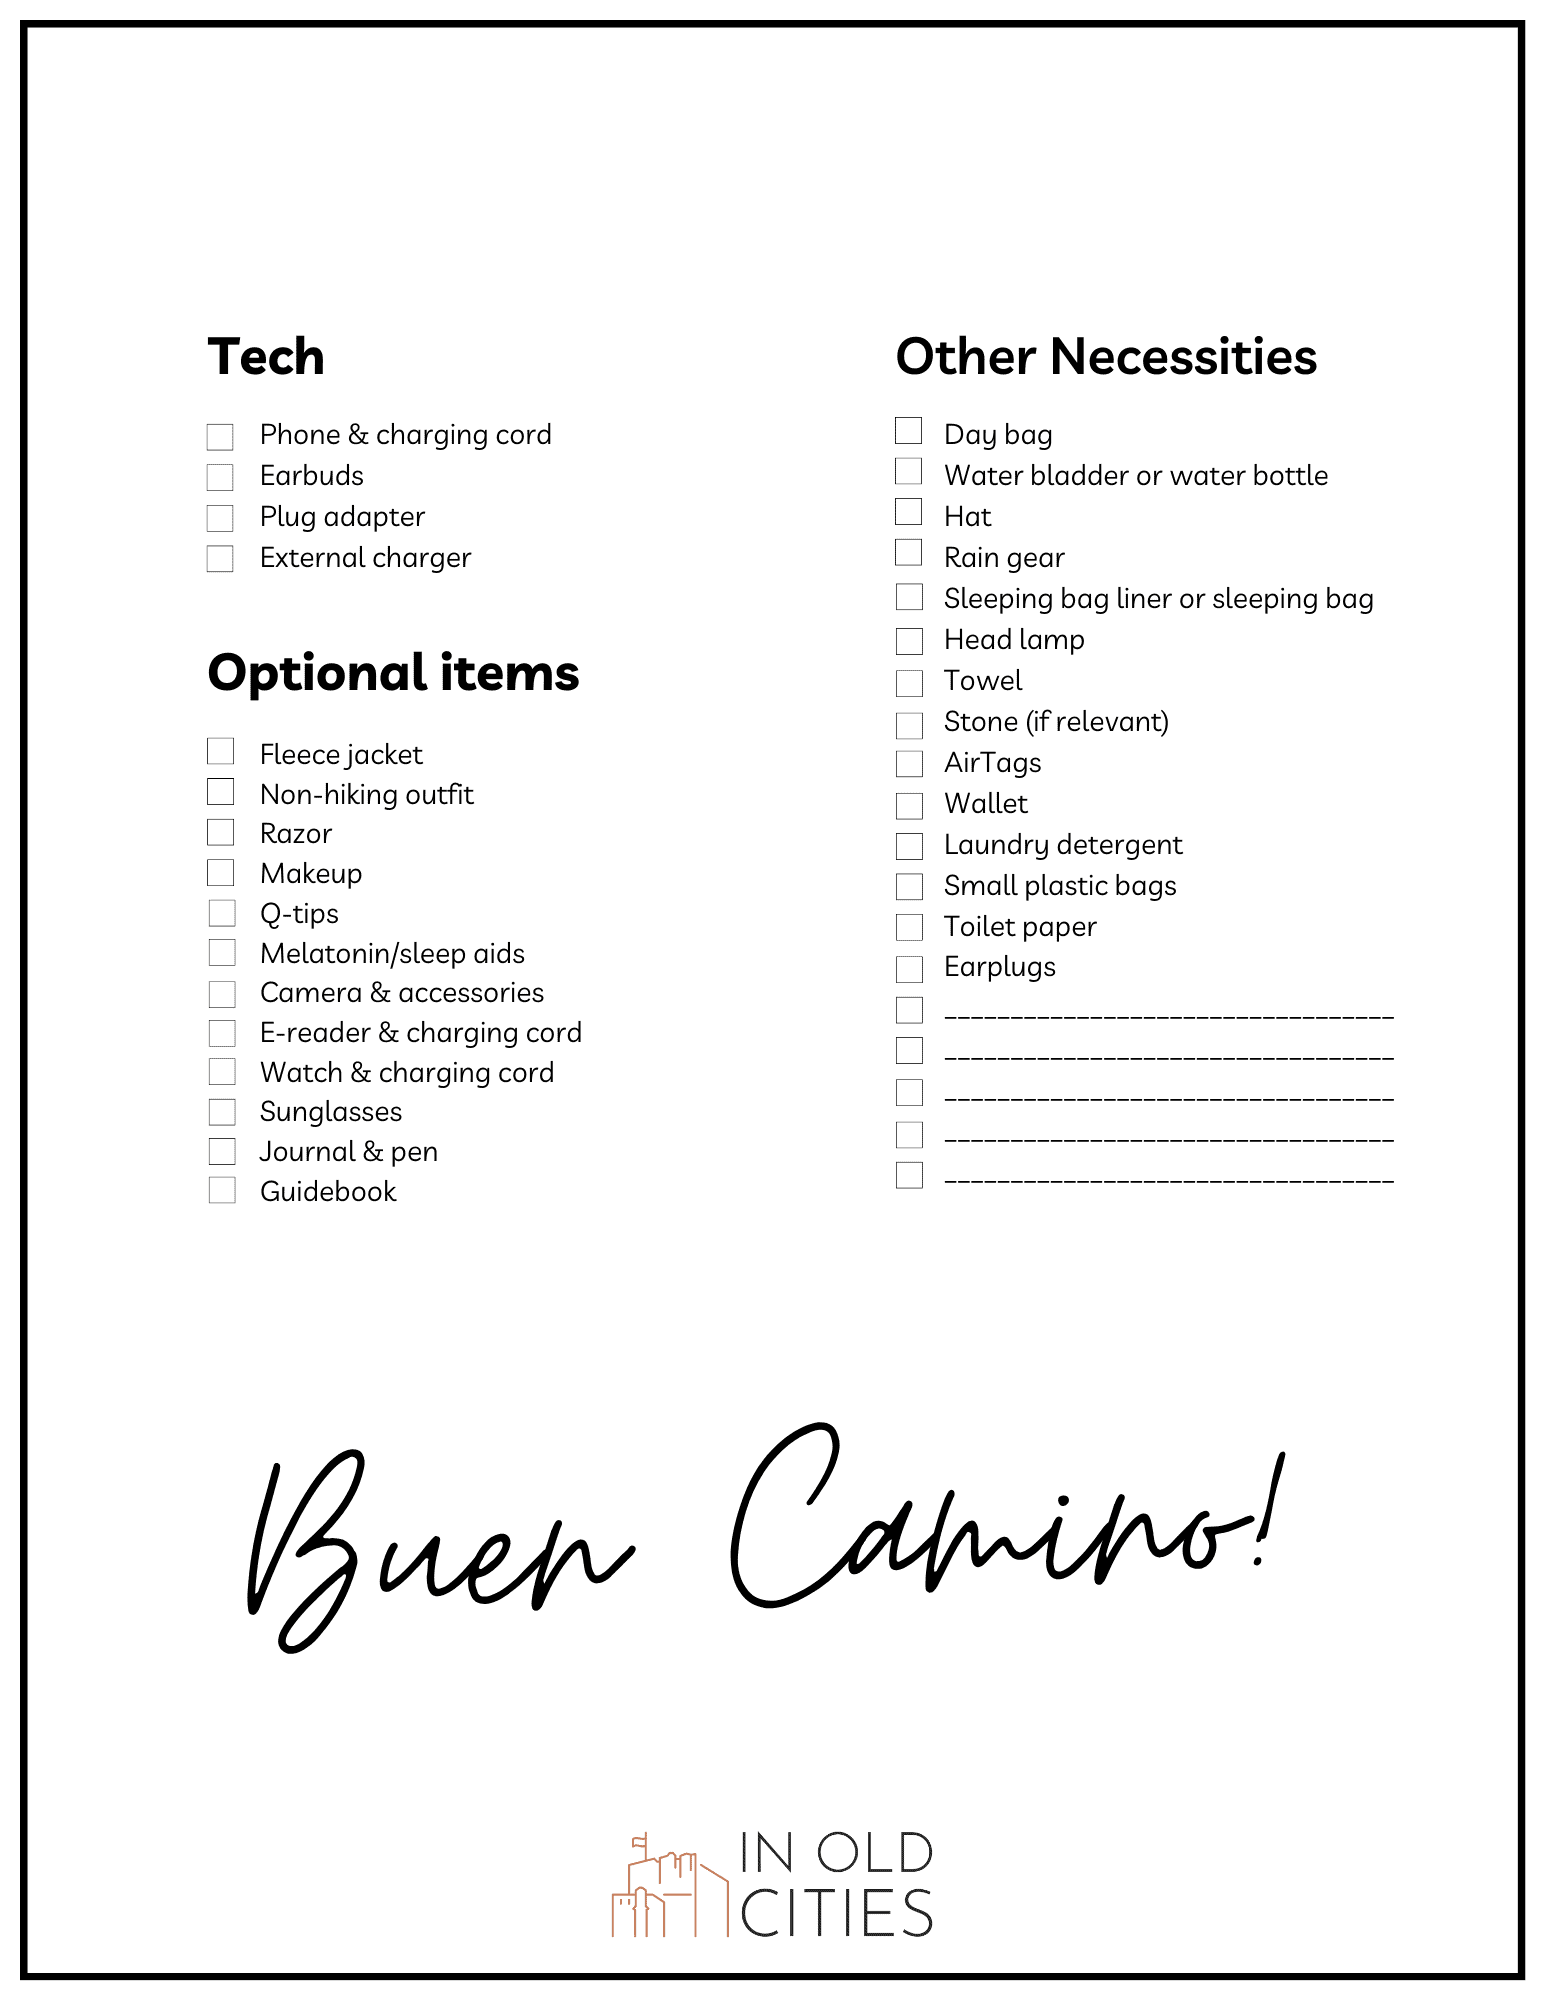
Complete Packing Checklist for the Camino de Santiago
After my experience on the Camino, here is what I recommend that you pack for the Camino de Santiago. I’ve provided it in checklist form so you can print it out!
Final Thoughts on Packing for the Camino
Packing for the Camino de Santiago can feel a little overwhelming, but remember:
- Every new pilgrim struggles with this — you are not alone, and you will figure it out!
- Err on the side of underpacking, because you can find anything you need along the way.
- The Camino provides!
Buen Camino!
More Information About the Camino
THE BASICS | Start with an introduction to the Camino de Santiago and 15 important things to know about the Camino, and read about a typical day on the Camino.
SAFETY | Find out what to know about safety on the Camino.
FOOD | From typical meals to costs, here’s everything to know about food on the Camino.
GO IT ALONE | Here’s what you need to know if you’re thinking about walking the Camino alone (like me!).
EXPENSES | Just how much does the Camino cost, anyway? Find out here.
GET READY TO GO | Here’s what to know about how long the Camino takes, how to plan for the Camino (or not!), and 9 helpful ways to prepare for the Camino.
ITINERARY | Want to walk the Camino Frances in about 34 days? Read my recommended itinerary.
CAMINO FRANCES | If you walk the Frances route, here are 10 incredible things you can expect to see — plus my own Camino photo diary.
SHORT CAMINO | Here’s how to walk the Camino in just 5 days.
PHOTOGRAPHY | A complete guide to taking great photos on the Camino de Santiago.
pin this post




Thank you! This is one of the most comprehensive and helpful packing lists that I have come across.
Oh, I’m so happy to hear that! Buen Camino!
Thank you for such a thoughtful and thorough packing overview. It was just what I needed! I am a year or two away from this hike, but am doing some advanced planning. This was very helpful.
Awesome! I’m thrilled to hear that. I hope you have a fantastic Camino when the time comes!